How to Point a Domain to Your Website

So you want to set up a new website for your business, church, or other organization? Great! Setting up a website is a critical step in the establishment of any organization. One of the most important steps when setting up a website is setting up a domain name to point to your website. A domain name, like “theuselessweb.com“, establishes a unique and easy-to-remember address for your website on the internet, lending your site a sense of credibility and authority. It is also the address you type in the browser to visit a site, if that wasn’t clear.
So, let’s get started with setting up a domain to direct traffic to your website. Before you begin, you’ll need a few basic pieces of information:
- An idea of the domain you would like.
- The IP address of the server your site resides on.
If you are working with a contractor for your hosting, they can likely provide you with the server IP, meaning that all you will need is to know what you want your domain to be.
Create a Registrar Account
A domain registrar is an organization that manages domains. There are a ton out there, including, and pretty much any domain registrar will do. If you don’t already have an account, feel free to use Namecheap. They are the registrar that will be used for demonstration purposes for the rest of this article. Just go your registrar’s website, and sign up for an account. Once you are logged in, you can move on to the next step.
Buying a Domain

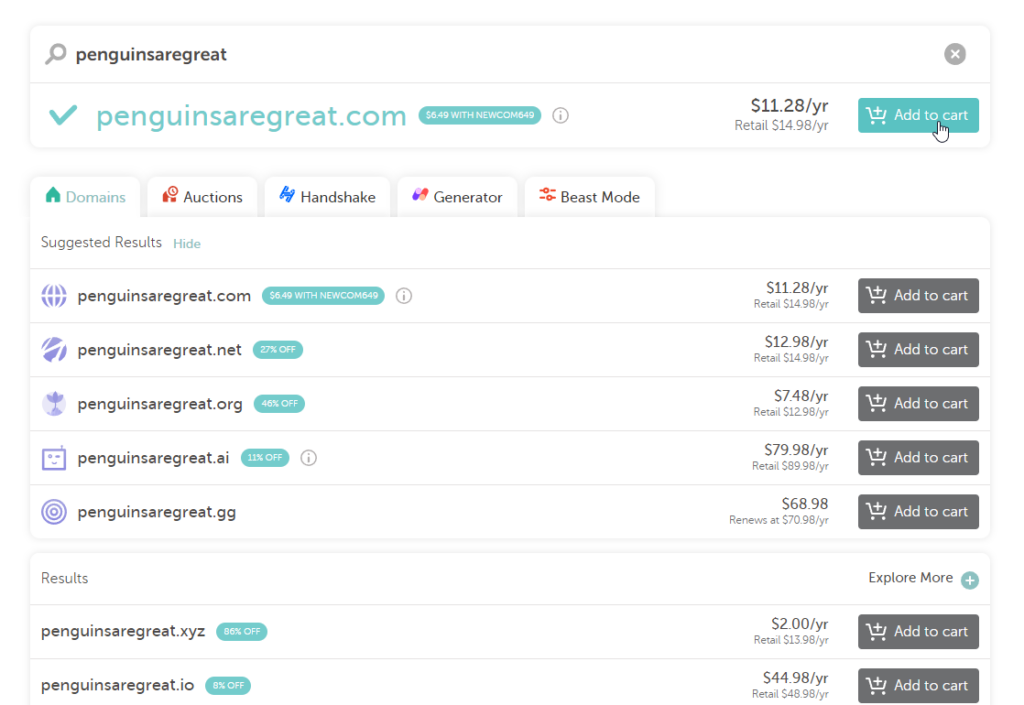
After you are signed up comes the fun part: picking out your domain. Navigate to the part of your domain registrar’s site that allows you to search for available domains. Type the domain you want, and search. You will be presented with a large list of domains with many different suffixes: .com, .net, .org, and many more. Ensure the one you want is available, and add it to your cart. After you are finished shopping, go through the checkout process. If the registrar tries to upsell you on extra services, you can skip these… they are not necessary for pointing the domain to your site.

Set Up DNS Records
When you visit a website on the internet, behind the scenes, your device sends a request to a domain name service server. The server has a big long list of domains and what server they point to. We need to add an entry for our site to that list, so that the domain name we just bought will route visitors’ requests to our server.
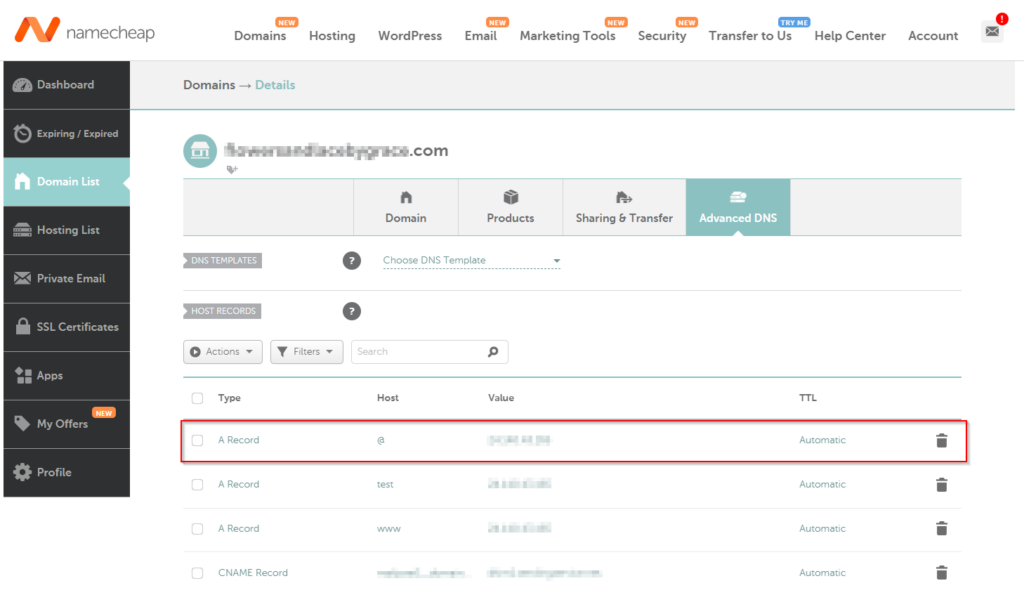
Fortunately, doing this is relatively simple with most domain registrars. Simply navigate to the part of the registrar’s site where you manage the domains you own (the “Dashboard” in Namecheap), and select the domain you want to manage. Poke around through the settings until you find the record management input (under “Advanced DNS” on Namecheap).
Once you have found this, we need to add a single record to the domain: an A record. An A record will have a few fields that need to be filled out: Host, Value, and TTL.
- Host: this specifies the subdomain to which this record applies. Whatever is entered here will be the prefix to the domain for which this record applies. For example, if you enter “www”, this record will apply to “www.yourdomain.com” instead of “yourdomain.com”. To simply target “yourdomain.com”, simply enter “@” in this field.
- Value: the IP address that this record resolves to. This is where you should enter the IP address of your server.
- TTL: specifies how long a cache of this DNS record will be stored before the cache is emptied and the DNS server will check again with the authoritative server. If possible, set this to automatic. It’s value should not matter much, opt for something in the middle otherwise.

Validate Site Configuration
After that, all that is left to do is to set up your website to respond to that domain. If you are working with a contractor, they will likely take care of this for you. Ensure your server and website are both configured to respond to requests to the domain you set the record up for, and you will be ready to go!
Conclusion
Sometimes, DNS changes take time to propagate across the internet. So do not fear if your site does not load properly at first. As long as you have followed these instructions correctly, your site will soon come online. Test it by visiting the domain you bought and set up the record pointing to your server for.
And just like that, your have managed to point a domain to your website. Excellent! Now, you have a professional website with a domain that lends your online presence a sense of legitimacy. If you have any questions pertaining to this guide, feel free to contact me using my contact page. I hope this guide proved useful to you. Enjoy your new domain!

Leave a Reply